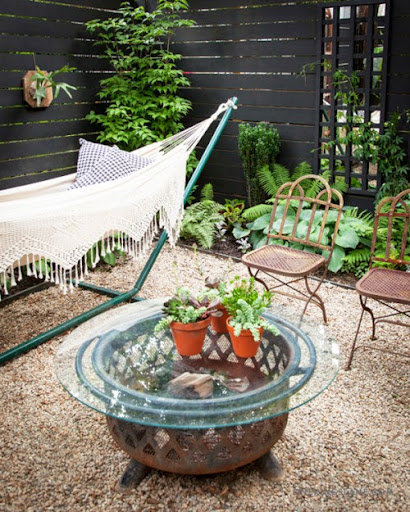
Right now I can’t get enough of my garden. To be honest, it was kind of a dirt pit at the beginning of spring, but since then a lot of work has gone into it, so I’ve really been taking time to appreciate the fruits of my labor. We’d added a fence for privacy, but I wanted to make the space feel bigger and glam it up a bit. Having always admired the mirror trellis used by the ever-chic Miles Redd, I decided to try to make my own. I have to say I’m pretty happy with the results! Keep reading for my step-by-step guide to this glamorous garden trellis, and be sure to check out all the tips and tricks I used for my full garden overhaul on the One Kings Lane Style Blog! —Megan
Photos by Lesley Unruh
Click through for the full how-to after the jump!
Here’s what you’ll need:
• A drill• A 3/16” drill bit (make sure it’s okay for use on plastic)• A dozen one-inch wood screws• 2 J brackets (for hanging)• A premade trellis• 1/8”-thick mirrored plexiglass cut to size (I bought mine at a local spot, but lots of hardware stores carry it)• A quart of outdoor paint (I used Benjamin Moore’s Raccoon Fur)
Steps:
To begin I painted my trellis the same color as my fence on the front and back. This is a little time-consuming, but once you’ve finished this part you’re almost done. I watered down my paint a bit, which really seemed to help the paint coat the uneven surface of the wood.
Tip: It also helps to use a painter’s tarp and lay the trellis flat on the ground.
Once your paint is dry, lay the mirrored plexi (mirror side down) over the back of the trellis.
Next predrill through the back of the plexiglass every place you plan to put a screw. I put one screw in each corner and one about every 18 inches along each side. I also predrilled the spots on the top edge where I planned to attached the J hooks.
After you’ve predrilled all your holes, secure the plexiglass panel in place with your wood screws.
Finally, attach the J brackets to the back of the trellis at the top edge. These brackets are like little hooks that fit through the horizontal slats of a fence and will allow the trellis to hang on the top of a fence slat. It also allows me to remove the trellis in the winter if I want.
Tip: You might have to adapt your hanging hardware a bit based on your fence situation. You could also attach a picture-hanging wire to the back of the trellis and hang it from a nail or a screw.
That’s it. You’re done! Now all you have to do is sit back and enjoy. To see some behind-the-scenes images of the making of my garden, follow me on instagram @mepflug #WeekendDecorator
Photos by Lesley Unruh